(This post may contain affiliate links.)
Geometry is a fun concept to teach. The kids appreciate the change after focusing heavily on multiplication and division and it allows for a great deal of hands-on learning. Part of teaching geometry includes understanding the concepts of translations, rotations, and reflections or in non-geometry student terms slides, turns, and flips. To teach these concepts, I have my kiddos make Tessellations. I remember making one in 5th grade and if I remember it, you know it had to be good. 🙂 Below is a step-by-step on how to make tessellations with kids.

Before you begin, there are great Tessellations picture books available to engage your students. I love incorporating literature any way I can.
Step 1: Cut out a perfect square for each kid. I cut up file folders so that the square has some gumption. 
Step 2: Cut a shape out of the bottom and slide it perfectly to the top where you should tape it in place. Cut another shape from one side and slide it perfectly to the other side where you should tape it in place. That whole perfectly thing can be tricky but there is some room for improvising.

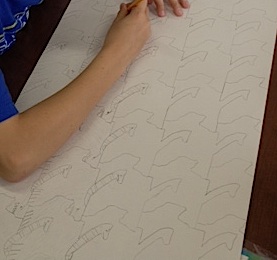
Step 3: Trace the tessellation pattern repeatedly on a piece of paper. It can be translated, rotated, or reflected depending upon what the kiddo wants and the type of pattern that was developed.
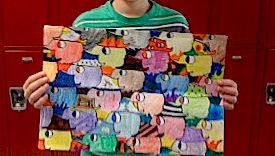
Step 4: Color the patterns either based upon what they look like or in any design that your creative juices enjoy.


*Before I teach this lesson, my kiddos play on Tessellation Town to understand the concept of tessellations and get some great ideas.